
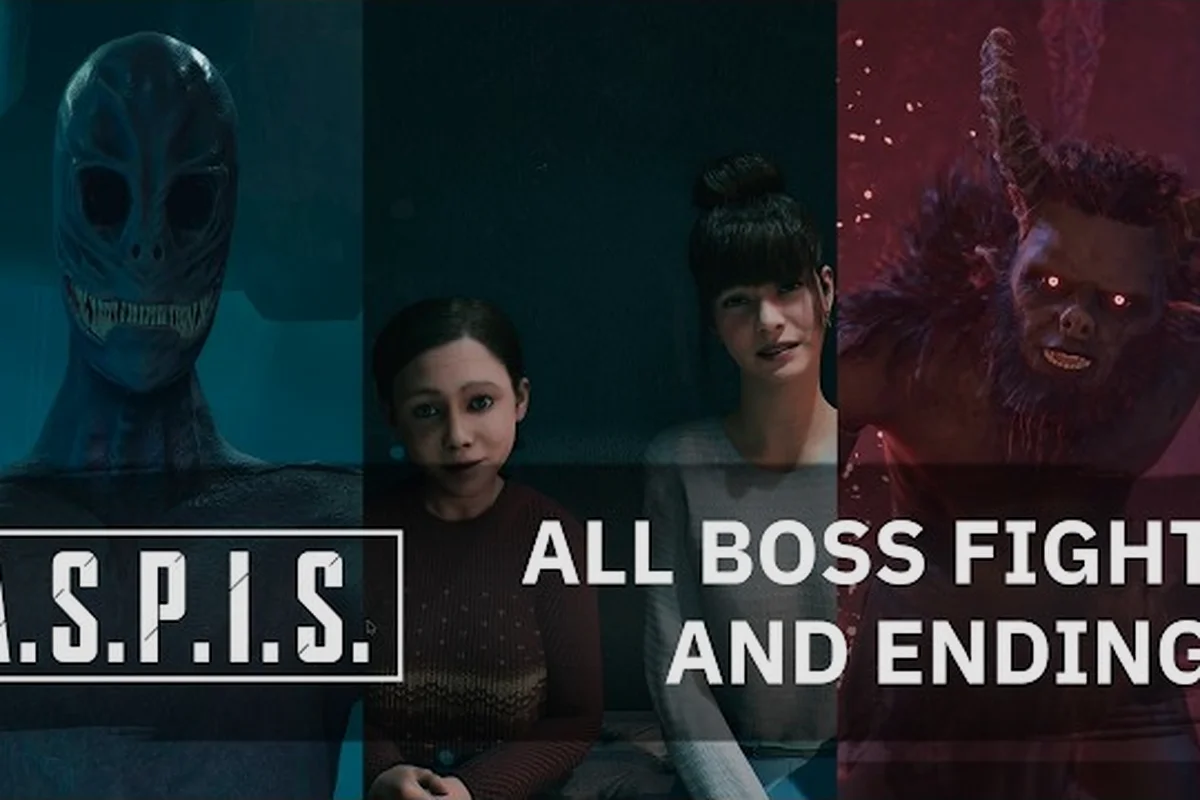
ASPIS combat is built around limited weapons, scarce ammunition, and enemies that cannot always be solved with gunfire. This aspis combat guide shows how to use the Makarov pistol, melee options, and careful movement to survive the Guardian and continue exploring.
ASPIS Combat Guide: Official Weapons and Core Rules
ASPIS gives Andrey a Makarov pistol, a melee option, and ammunition discovered while exploring. According to the official ASPIS combat details on Steam, those are the only documented combat tools. There is no published damage chart, ammunition capacity, stamina system, or weapon roster, so a reliable strategy must focus on what the game actually confirms: conserve supplies, avoid unnecessary fights, and use the environment.
The important distinction is that ordinary opponents and the Guardian require different solutions. A conventional enemy may react to pistol fire, but the Guardian cannot simply be shot. Trying to win an aspis guardian fight by emptying the magazine is therefore a poor plan when the real objective is escape.
What the official material confirms
| Combat element | Confirmed detail | Practical consequence |
|---|---|---|
| Ranged weapon | Makarov pistol | Fire only when a shot creates a clear opening |
| Close-range option | Melee combat | Use when approaching or retreating is safer than firing |
| Ammunition | Found while exploring | Every unnecessary shot reduces the reserve for later encounters |
| Guardian | Cannot simply be shot | Treat the encounter as a survival problem, not a damage race |
| Setting | USSR in 1987, alternate history | Isolation and resource scarcity fit the survival approach |
The same source lists the PEP-01 device and astral windows as central to the story, but they are not published as conventional combat abilities. Do not expect the device to function as an extra weapon or substitute for ammunition. The six volunteers also form the story’s experimental group rather than a confirmed squad of allies who will fight beside you.
Deciding When the Guardian Can Be Fought
A dependable approach to aspis how to fight consists of three linked decisions: first decide whether the ASPIS Guardian can be held in a direct pistol exchange, then check whether its pursuit behavior can be broken by breaking line of sight, and finally estimate whether the ammunition already carried is worth spending. A cautious example is to fire only when the Guardian’s movement briefly creates a safe firing window, then reposition behind cover before it closes the distance. This matters because a Guardian chase punishes a stationary player more severely than a missed shot; preserving mobility can keep the encounter manageable even when a full magazine cannot remove the threat.
-
Assess the encounter. Identify whether the opponent can be engaged with the pistol or whether the scene is a pursuit that demands movement and concealment.
-
Preserve an exit. Before firing, make sure you can move behind cover, change direction, or leave the area without becoming trapped.
-
Spend only what the situation requires. One accurate interruption may be better than several shots that reveal your position and consume the reserve.
That loop matters because ASPIS appears to reward reading situations rather than rapid weapon use. The environment provides ammunition and other resources, but finding a replacement can require returning to dangerous areas. The ASPIS ammo overview explains why keeping a margin between your current magazine and an empty one can make later exploration less dangerous.
ASPIS How to Fight Ordinary Enemies With Limited Resources
The most effective general principle is to make every encounter shorter than expected. You do not need to prove that the pistol can defeat an enemy; you need to reach a safe state with ammunition still available. This makes aspis how to fight less about aggressive gunplay and more about controlling distance, selecting targets, and deciding when violence is unnecessary.
Establish the safest firing position
Before using the Makarov, look for a position that limits the opponent’s approach. A corner, doorway, or piece of environmental cover can prevent an enemy from reaching you from several directions. The goal is not to create an elaborate firing position; it is to preserve a single reliable escape route while you attack.
A useful two-window rule means you give an opponent an opportunity to notice you and then a second opportunity to close the distance. If the enemy reaches the second window, retreat immediately rather than trying to force a third exchange. Since the game does not publish enemy behavior details, this remains a general survival tactic, not a claim about confirmed AI patterns.
| Situation | Better response | Reason |
|---|---|---|
| Clear path and distant target | Aim, fire, then change position | A single effective interruption may prevent a longer fight |
| Close opponent with no clear retreat | Use melee if possible | It avoids spending scarce ammunition |
| Several threats in the same area | Create distance and isolate one target | Fighting as a group multiplies danger |
| Unknown hostile near an exit | Delay the attack | Losing a position is worse than losing one round |
| Ammunition already scarce | Search for another route | Avoid turning a manageable encounter into a resource crisis |
Prioritize retreat over victory
A successful escape is still a combat success when the opponent is unkillable, a route is closing, or the ammunition reserve is dangerously low. The official store description does not promise that every opponent can be defeated, and this guide will not invent unsupported health or damage values. A player who understands that limitation can make cleaner decisions.
The same principle applies to ammunition. A missed shot is not merely wasted metal; it may also announce your position. When there is no safe line of fire, advance behind cover, look for another approach, or leave the area. The ASPIS combat difficulty analysis is useful for understanding why a cautious route can produce better outcomes than a direct confrontation.
Use melee as a bridge, not a reflex
Melee becomes valuable when it closes a short gap, interrupts an approach, or provides an alternative to firing. It is not automatically safer than a pistol. If using melee requires standing in an exposed position for an extended period, the apparent ammunition savings may not compensate for the increased risk.
Think of melee as a low-cost transition tool. The player moves from concealment to a brief contact point, uses the attack to create space, and then returns to movement. If the space does not open, disengage rather than continuing a prolonged struggle. The ASPIS melee and shortage guide examines the tradeoff between close combat and keeping rounds available for a later crisis.
ASPIS Guardian Fight: Why Gunfire Is Not the Solution
An aspis guardian fight cannot be resolved by treating the Guardian as an ordinary health bar. The official store page explicitly says the Guardian cannot simply be shot. That makes an all-out pistol assault strategically unsound: it may consume ammunition, reveal your position, and reduce your ability to handle ordinary enemies later.
The correct frame is an escape problem. You need to understand where you are, identify the direction of safety, and use distance and concealment to break the encounter. Understanding the threat’s role in the story can also clarify your priorities; the ASPIS Guardian character overview provides useful narrative context without claiming unsupported combat values.
The Guardian pursuit plan
Treat a Guardian chase as a routing problem rather than a firefight: the moment its attention locks on, every movement choice should preserve future exits instead of merely delaying contact. For example, if the Guardian follows through a wide doorway, crossing a narrow threshold can reduce its pursuit angle, while a room with two exits is safer than a corridor that ends at one door. The priority is to keep open spaces, doorframes, corners, and changes in elevation between you and the Guardian, since these features can break its direct approach and leave time to reassess. With no published damage, pursuit-distance, or attack figures available, treat the Guardian as a persistent pursuer that cannot be solved simply by unloading ammunition.
-
Create separation. Move away from the immediate threat rather than standing still to fire.
-
Break the direct line. Use corners, doorways, rooms, and changes in elevation to interrupt pursuit.
-
Listen and reassess. Determine whether the threat is still approaching before committing to another route.
-
Protect the escape route. Avoid moving into a dead end unless that space contains a clear alternative.
-
Save ammunition. Fire only if a brief shot produces meaningful separation and the next move is already planned.
This is deliberately conservative because the game has not published damage, pursuit distance, or attack data. The plan rests on one confirmed premise: the Guardian cannot simply be shot. Treating bullets as a general-purpose answer to the encounter would contradict that premise.
Fire only as a supporting action
Pistol fire can still be part of an escape, but it should not be the foundation. A shot is most defensible when it buys time, opens distance, or interrupts movement without trapping you. If firing leaves you with no cover and no clear direction of travel, it may worsen the situation.
| Guardian response | Recommended action | Avoid |
|---|---|---|
| Immediate pursuit begins | Run through a route with multiple turns | Stopping to test damage |
| The Guardian blocks the direct path | Redirect through cover or another passage | Charging into an isolated area |
| Ammunition is nearly exhausted | Prioritize evasion and concealment | Spending the final rounds out of panic |
| The route briefly opens | Move while the opening exists | Lingering to confirm the result |
| A dead end is reached | Turn early and find another route | Committing with no alternative |
When to accept that an encounter is lost
If the Guardian is between you and the only known exit, the encounter may be better left alone. An aspis how to escape the guardian solution does not require defeating it, winning a damage exchange, or clearing the room. It means preserving your ability to move, retain ammunition, and try again from a different position.
Community reports can reveal specific routes and hiding spots, but they should be treated as player experience rather than confirmed mechanics. The verified ASPIS chase sequence guide provides the appropriate framework for comparing reported routes and separating practical advice from unsupported claims.
ASPIS Guardian Chase and Hide-and-Seek Tactics
An aspis guardian chase becomes manageable when you stop treating the scene as a straight sprint. The goal is to replace the Guardian’s direct access to you with uncertainty. Every turn, doorway, and alternate path can interrupt the direct pursuit, while controlled use of the pistol can preserve a margin of separation.
The hide-and-seek side of ASPIS is especially important because stillness and movement are both tools. Staying in one place is useful only when the area offers multiple exits or genuine concealment. Remaining visible simply because you stopped moving gives the threat an easy target.
Maintain three escape options
An area with one exit is not a hiding place; it is a trap. Before you settle into cover, identify the next two places you can go. This is not an official AI rule, but it is a sound way to prevent a pursuit from becoming a dead end.
| Cover quality | Characteristics | Best use |
|---|---|---|
| Strong | Multiple exits, limited sightlines, useful nearby objects | Preferred position during a high-risk pursuit |
| Moderate | One exit plus a second route nearby | Temporary break point |
| Weak | One exit, open ground, no useful objects | Avoid unless it is only a momentary stop |
| Exposed | No cover, no alternative path | Do not use as a long-term hiding position |
The ASPIS stealth and hiding guide can help you evaluate concealment separately from weapon use. This distinction is important: a hiding tactic only works if the environment supports it, and the official material does not publish a list of guaranteed safe spots.
Break pursuit with controlled movement
Moving suddenly is not automatically stealth. If you sprint through the same visible corridor the Guardian already knows, you may simply accelerate the encounter. Instead, vary your route, pause behind solid cover, and move again when the pursuit line is less direct.
A reliable pattern is observe, redirect, then settle: treat the Guardian chase as a positioning problem rather than a straight sprint. First confirm its current route, then use pillars, doorframes, and changes in elevation to break its line of sight before it can close the distance. Only after the pursuit has shifted should you assess cover, inventory readiness, and the next route. This makes the approach useful in cramped Soviet research corridors as well as wider industrial or underground spaces, where an early mistake can leave no room to change direction.
-
Observe: Note where the threat moved and which direction it appears focused on.
-
Redirect: Use a secondary path to change the encounter’s geometry.
-
Settle: Only stop when the location offers cover and a meaningful next option.
This pattern supports aspis hide and seek play because it does not depend on one specific container, locker, or room. The same sequence can be adapted across the game’s Soviet research, industrial, and underground environments described in official materials.
Avoid common pursuit mistakes
Three errors create most avoidable Guardian failures: treating the chase like a standard enemy encounter, assuming a successful shot ends the pursuit, and reusing familiar cover without checking the Guardian’s approach angle. The Guardian changes behavior during the hunt, so the safest response is to break line of sight, listen for its movement cues, and relocate before it can corner you; otherwise, a single missed shot or predictable retreat can turn a survivable encounter into a chase you cannot escape.
-
Firing first and moving later. The shot may create only a temporary opening.
-
Retreating into the room you just entered. Familiarity does not make the room safer.
-
Using the same cover twice in succession. A position that worked once may not work when the threat approaches from another direction.
Instead, preserve information. If you know where the threat is and which paths remain open, you can choose the next move without panicking. A player who accepts that the Guardian cannot be solved like a normal enemy is already mentally prepared for the encounter that follows.
ASPIS Ammo Conservation and Weapon-Use Tactics
Conserving ammunition in ASPIS is not simply an efficiency exercise. Because pistol ammunition must be scavenged from dangerous locations, each unfired Makarov round preserves access to a future Guardian encounter without requiring another risky resupply run. A practical example is to fire only when a target is clearly exposed, then disengage behind cover instead of emptying the magazine while the Guardian is still approaching; this limits ammunition use, reduces noise and pursuit pressure, and keeps alternative escape routes open for the broader ASPIS hide-and-seek encounter.
The Makarov is the only documented firearm, so the best “loadout” is not a collection of stronger weapons. It is a disciplined sequence involving the pistol, melee, cover, and retreat. Official material does not publish ammunition capacity, pickup amounts, or damage, which makes flexible resource management more important than invented calculations.
Reserve thresholds for uncertain situations
You should not wait until the magazine is empty. Reserve enough ammunition for an emergency and treat spare rounds as a valuable resource. This does not require a numeric threshold, because no official capacity is published. Instead, judge reserves by the questions below.
| Reserve condition | Combat decision | Reason |
|---|---|---|
| Ammunition plentiful for the visible route | Engage only clear threats | Maintain freedom for later areas |
| Ammunition limited but alternatives exist | Avoid optional fights | Search for another route first |
| Ammunition very low | Treat every encounter as an escape problem | Seek pickups before using the final rounds |
| No ammunition and a hostile is present | Use cover, melee, or withdrawal | Do not depend on an empty pistol |
| Guardian blocks the route | Hide, redirect, or wait | Firepower alone cannot solve the encounter |
The shot-budget decision
Before pulling the trigger, ask what the shot is buying. If the answer is only that you want the enemy to stop moving momentarily, the shot may not be worthwhile. If it creates a safe crossing, interrupts an approach, or prevents a hostile from reaching an exit, it has a clearer purpose.
A shot-budget decision can be written as a simple sequence: identify the immediate risk, identify the shortest route to safety, and identify whether firing changes that route. If it does not, preserve the ammunition. This method is particularly useful for players searching for aspis how to survive the guardian advice, because it keeps the pistol in a supporting role.
Separate necessary combat from optional combat
Not every hostile encounter needs to begin. Explore around obvious danger, listen for movement, and use alternate paths when available. The ASPIS equipment menu overview is worth consulting so that you understand the small documented toolkit before entering a dangerous area.
A good ammunition plan also has three layers, each tied to a different stage of the Guardian chase. The immediate layer covers a brief unavoidable encounter, the recovery layer accounts for ammunition found at a known supply location, and the emergency layer preserves a final reserve for when escape routes have already collapsed. Because the Guardian cannot be shot, deciding when to spend ammunition matters as much as how much you carry: firing too early can leave no way to break line of sight during the chase.
-
Immediate layer: Enough to handle a short, unavoidable threat.
-
Recovery layer: Ammunition that can be replaced if you find a known supply location.
-
Emergency layer: A final reserve kept for a situation where retreat has already failed.
Treat this as a decision framework rather than an official mechanic, because ammunition must be collected from the environment while the Guardian itself cannot be shot. That limitation makes each shot a deliberate allocation: for example, use the immediate layer to create distance from a short encounter, save the recovery layer for a confirmed supply location, and retain the emergency layer for a Guardian chase when escape routes have already collapsed. In practical terms, firing early can consume the ammunition needed to break line of sight later, so the best response may be to retreat, reposition, and preserve the final reserve.
ASPIS How to Survive the Guardian in Unfamiliar Areas
Aspis how to survive the guardian becomes less mysterious when you prepare before the encounter starts. The surrounding area, your ammunition reserve, and your route choices all influence the outcome. Preparation does not guarantee safety, but it reduces the number of decisions you must make while the Guardian is approaching.
Prepare before entering a dangerous area
Pause before moving through a new district or restricted area. Confirm which routes you can see, identify nearby cover, and note where you can retreat if the encounter changes. The official setting includes a wide range of Soviet-era locations modeled from real research institutes, factories, and warehouses, so spatial variation should be expected.
Also check your practical state without relying on undocumented meters: verify the conditions that directly affect an Aspis encounter, such as whether the PEP-01 is equipped, what remains of its ammunition, and whether the Energy X interaction is available. Treat the PEP-01 as a story and exploration tool unless the game explicitly presents a new combat function, and use visible cover, line of sight, and movement options to judge whether a confrontation is survivable before committing to it.
-
Ammunition remaining.
-
Melee readiness.
-
Inventory space for recovered supplies.
-
A plausible retreat toward a known location.
-
A clear reason for entering the area.
If you cannot explain why you are entering, you may be walking toward danger without a goal. The PEP-01 and its interaction with Energy X should be treated as story and exploration tools unless the game explicitly presents a new combat function.
Adapt the plan to the space
The same Guardian strategy should not be applied identically in every location. A narrow facility may favor turns and doors, while a large industrial room may provide longer sightlines and fewer corners. In a confined space, a pistol may briefly discourage a close approach; in an open area, movement and cover may matter more.
| Environment | Main advantage | Main danger | Best adjustment |
|---|---|---|---|
| Narrow corridor | Limited approach angles | A missed turn can trap you | Reverse early and use a secondary route |
| Large room | More possible exits | Long sightlines expose you | Cross between cover rather than staying visible |
| Dead-end room | Temporary cover | Only one meaningful exit | Leave before the threat closes in |
| Outdoor or exposed area | Wider view of danger | Few places to break a chase | Prioritize distance and route changes |
| Storage or industrial area | Obstructed sightlines | Uncertain paths and dead ends | Mark an alternate exit before engaging |
Retreat with purpose
Retreat is not simply running in the opposite direction. Choose a destination that provides cover, a turn, or another decision point. If the Guardian is faster in a direct line, use the layout to prevent it from reaching that destination directly.
If the retreat fails and ammunition is scarce, switch from fighting to concealment. Use the aspis hide and seek approach by choosing a position with more than one exit and avoiding repeated movement between exposed points. The ASPIS hide-and-seek guide can help you review the difference between temporary cover and a defensible hiding position.
Accept imperfect outcomes
Survival includes leaving a fight, abandoning a route, or spending resources to reach a safer area. It does not require perfect efficiency. A retreat that preserves the Makarov and allows continued progress is often better than a victory that leaves you vulnerable in a distant part of the map.
That principle is the core of this aspis combat guide: control the encounter instead of demanding a conventional kill. The pistol handles limited threats, melee covers situations where firing is wasteful, and movement solves the encounters that bullets cannot. Together, those tools let you survive the Guardian, explore more safely, and keep scarce ammunition available when it truly matters.
Frequently Asked Questions
Can you kill the Guardian in ASPIS?
No conventional solution is confirmed, and the official store page says the Guardian cannot simply be shot. Treat the encounter as a stealth and escape challenge rather than a damage race. Preserve ammunition, move through routes with multiple exits, use cover to break pursuit, and avoid committing to an isolated dead end.
Should you fire the Makarov pistol during a Guardian chase?
Only when a shot has a clear tactical purpose, such as creating time or space to reach a safer route. The game provides no confirmed Guardian damage values, so repeated fire is unlikely to offer a reliable solution. Move first, preserve an exit, and use the pistol only when it supports the next step of your escape.
What is the best way to conserve ammunition in ASPIS?
Delay optional fights, collect ammunition whenever exploration provides a safe opportunity, and keep a reserve for unavoidable encounters. A shot that merely attracts attention may cost more than it provides. Because the official material does not publish ammunition capacity or pickup amounts, use your available reserve and the safety of the surrounding area as your guides.
Is melee combat safer than using the pistol?
Melee is useful when it closes a short gap, interrupts an approach, or avoids wasting ammunition. It becomes risky if it requires prolonged exposure in an open area. Treat melee as a brief transition between movement and cover, not as a universal replacement for the Makarov, and disengage when the opening fails to improve your position.